Tuesday, June 30, 2009

Shade Cover

Hooray for my wonderful husband who indulges me and my hobbies and has built an amazing shade cover system for my garden! This shade house will hopefully provide enough cooling to allow the garden to survive the oppressive heat of July and August in Texas. Every other year, I have treated the summer as the end of the growing season. This year, with the shade house, I hope to be able to keep the plants going through the summer.

Hubby used his day off on Friday to rent an auger and drill big holes in the yard around the perimeter of the garden. He then mixed concrete and set 2.5 inch posts into each of these holes. The top of the 2.5 inch post is just level with the ground. Into these ground posts we insert a 10 foot 2 inch pole. This allows us to completely take down the shade cover when it is not needed and not have ugly 10 foot posts sticking out of our garden year round. Poor hubby dug these holes and mixed concrete in the 102 degree heat on Friday... wow!

The shade cloth was purchased from Home Depot. The fabric is 6 feet wide and comes in 50 foot rolls for $77 each roll ($1.54 per foot). Lowes sells the same fabric on a by-the-foot cost of $1.75 per foot. We chose the tan colored fabric since it matched our house color.


We cut two rolls of fabric in half so we had four 25x6 foot sections. We sewed the long edges together to give us a cloth that was 24x25 feet long. Sections of fabric 25x6 long are hard to work with. We started sewing in the living room, then moved to the backyard so we could more easily handle the large size of the fabric.


The edges of the fabric 'should' be hemmed to provide additional strenght, but we were trying to get this thing up fast so we put this step off for later.


If the pictures seem a bit dark, it is because it was dark outside. Projects like this have to wait until after the kiddos have been put to bed.

Each corner of the fabric was rolled over a piece of 2x2 wood and zip ties were used to hold it in place. These hangers are tied to eyebolts set at the top of the vertical posts. A bit of trial and error was used to get the fabric to fit the garden well.


June 30th
Tonight we set the posts and tied off the corners of the shade cover.
We started at the back end of the garden. The posts were set outside our privacy fence.

The fabric was just draped across the plants at this point. We then found that the back end was too long and we had to re-tie the cloth to the hangers.


Adjusting the back end.


Almost up.

Once again, anohter project finsihed after dark.

Harvest June 28, 2009


3lbs tomatoes
7lbs squash
1lb peppers and cucumbers

Thursday, June 25, 2009

June 25, 2009 updates

This is the latest new visitor to the garden. I very regularly see green anoles and geckos, but this is the first time I have seen one of these guys. He held still long enough for Curtis to snap a few pictures.


He then ran off to the honeysuckle patch


Wikipedia says this guy is a Texas Spiny Lizard. http://en.wikipedia.org/wiki/Texas_Spiny_Lizard


Here is what the cleaned out potato area looks like.

There are tons of these small white butterflies in our yard and garden. Since none of my plants appear to have any damage, I'm going to assume they are friendly as caterpillars--at least they do not eat veggie plants.

These are two monarch butterfly caterpillars that were feasting on what was left of my parsley plant. We only saw them that one day, then they disappeared. I hope they just moved on and did not get eaten.


Here is one of my favorite parts of gardening...sharing! These two goodie bags went to the daycare workers at church.

Yummy grilled squash

Tuesday, June 23, 2009

Root Development of Vegetable Crops

Interesting study from 1927 on the root development of veggie crops.
http://www.soilandhealth.org/01aglibrary/010137veg.roots/010137toc.html

We are looking at using moisture sensors to determine soil water content and this will give me a baseline to determine where to place the sensors and also the depth.

Monday, June 22, 2009

Potato Patch reborn

This weekend I cleaned out what was left in the potato section of the bed. When originally planted, this section held 6 rows of potatoes, 5 rows of onions and 1 row of scallions.
See how pretty and orderly it is on April 15th?

The potatoes quickly out grew their rows, tipped over, and kept growing some more. Oh and at some point (April 18th), I decided to stick 5 more tomato plants into the same little area...
April 26th

As if this were not all crowded enough, my composted pumpkin from last year started to sprout in the same area and had set fruit before I was able to tear it out...


Mix in a wild spattering of Jeurasalem artichokes and it made for a section so dense that the onions were completely shaded out. I planted over 150 onions in this section and have only found fewer than 50, most of which are just golf ball sized. The shallots grew a little bit, and I do plan to replant them now that the potatoes are done.

This weekend, I was able to harvest another 4.5 lbs of potatoes, Kennebec White and a few reds that I missed the first time around. I pulled out the stray Jeurasalem artichokes, used clothesline and t-posts to secure the rest of the Jeurasalem artichokes, and loosened and raked the soil. I staked up the spindly tomato plants, re-directed the pumpkin vines (more fruit is setting now), and planted 2 Black Beauty eggplants, 1 store bought sweet potato vine, and 1 home sprouted sweet potato (it started growing in my veggie drawer in the pantry). Curtis also cut up 3 store bought potatoes that had sprouted eyes and I planted those along the back fence. So once again, this bed is over crowded, but I just can't help myself.

Squash-mid season review

This year we planted one full section of squash in the garden. The first Patty Pan (white scallop) seeds were started indoors in yogurt cups in early March. They sprouted great, but got leggy fast, even in my sunniest window. They were set out in the garden before the end of March.


Squash section of the garden, March 23, 2009

On March 23rd my garden helpers planted the rest of the squash seeds directly into the garden. Curtis made little dirt hills surrounded by a moat and a wall of dirt to help hold the water near the plants.

The idea was to plant 3-5 seeds on each hill, but apparently a few more were planted per hill than originally intended...
I count 15 plants on this hill. April 15th, 2009

We also added loops of soaker hose around each hill and throughout the squash section. The easy answer to this overabundance of squash would be to thin out the seedlings, but... the seeds were a mixed bag of 7 different types and I did not want to kill off any one kind by thinning too early. So I let ALL the squash grow, and grow and grow...

April 26, 2009

until I am now unable to walk in that section of the garden and have to wade through the thigh high plants to harvest squash.

June 16, 2009

In terms of productivity, the Caserta (light green squash with dark green stripes) has been the most productive. Second is the patty pan (white scallop), followed by zucchini, round squash, cocozelle (dark green curved with pale stripes). The poorest performers are the yellow squash, I have picked two tiny crookneck yellow squash, and only seen one straightneck yellow squash, but it was too mushy to cook with. I have tried hard to pick the squash small, to avoid them getting tough skinned and seedy. So far, I have only had to toss two or three that I had let grow for too long.

In terms of flavor and taste, my favorite is still the patty pan, followed closely by the round squash. The zucchini, caserta, and cocozelle all have similar flavor. The zucchini has a more firm flesh and it appears to resist getting seedy longer than the other varities.


Patty Pan with flower May 19th

Caserta?

Cocozelle?

Zucchini, Caserta, beans and potatoes

Caserta, 2 onions, round squash, beans

Next year, I hope to grow more of the vining varities of squash vertically (patty pan, and round). This year already, I have been able to train a few of the trailing round squash vines to grow up plant cages in the bed, that makes harvest much easier. I also need to allow more spacing, or thin more efficiently. Despite having clear favorites for the differnt types, I still would plant a wide variety, it is more fun to pick 5 different kinds than a bunch of just one or two varities.

Jacobs Cattle Bean

We planted a new type of shelling bean this year called Jacob's Cattle Bean.

Pretty beans, just like spotted cows. Purchased from Seeds of Change http://www.seedsofchange.com/garden_center/product_details.aspx?item_no=S10954

It is an heirloom variety of bush shelling bean. I put in a single row, as an afterthought along the fence line of the garden.
Jacobs Cattle Bean Row, April 24, 2009


The plants came up strong and topped out at only about 8-12 inches tall. Despite the small height, each plant had 4-8 pods on it.
May 24, 2009

When the beans were young, I picked about a dozen and cooked them up like green beans (blanched and cooled to eat), but they were too tough for my tastes. After that experiment, I just allowed the pods to dry on the plants.

Harvet on June 11th, 2009

I picked all of the plants on June 11th, just before a big rain. 90% of the plants were dead from the heat and the others were yellowed. I allowed the plants to dry in a basket for a few days and then enlisted the help of boy's small fingers to help shell the beans. Forget child labor laws, he loved the task.

It was not much of a harvest. I planted about 20 plants and harvested 1/2 cup of beans, mabye enough for a side dish. I'm not sure it was really worthwhile use of space in my small garden. Still, what a pretty bean and my first sucessful crop of shelling beans.

Friday, June 12, 2009

Taming of the Tomatoes

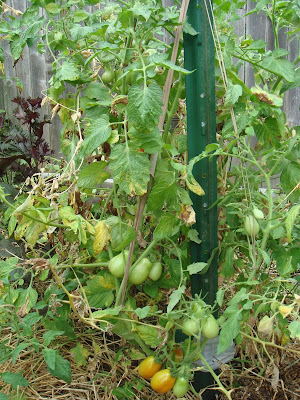
With all of the great rain we have gotten this spring, my tomato patch had grown into a jungle.


It was impossible to walk between the plants and I also found that many of them had branched out several feet and were taking over the other plants. Many of the large tomato cages had already tipped over, soI drove t-posts into the middle of the cages to support the plants.


Since I was not so diligent in keeping the tomato branches inside the cages, I had to untangle many of the plants and secure them back to the proper area. For this, I have found old nylons to be the best.


I like to use loops of nylons for this. I first cut 1 inch strips from the legs of the nylons.


I can wear these loops like bracelets as I am taming the garden. It is much easier to have them so accessible rather than across the garden when I am in a tight spot.


Here is the SuperSweet 100 cherry tomato plant, before my efforts today. This is the plant that tipped me off that odd things were happening in the garden. This guy grew a branch along the ground and then up into the Beefsteak plant. After I had untangled the branch, I saw it was over 6 feet long! It took me the longest time to get it carefully sorted out, but this guy had about 5 branches that long. I carefully trained them up the fence. I hope this gives the plant a little more light and air, as well as making it much easier to harvest.


Here it is after it had been beaten back into submission--and trellised to our 6 foot high privacy fence.


On June 9th, we picked our first ripe tomatoes from the SuperSweet 100 and one from the Little Porter plant. I'm not a huge fan of cherry tomatoes, but I always end up planting at least one. They are by far the best producer, but the skins always seem too thick for my taste and they are more acidic than I like. The Little Porter was yummy, it was fleshy with thin skin, but only about the size of a golf ball, or a Little smaller.

On June 12, I picked two Heirloom Beefsteak tomatoes that were ripe. The fruit themselves was not huge, about racquetball sized, but it was delicious. The shape of these guys is not pretty, very wrinkly and folded at the top, not the tidy neat tomato that is sold at the store. The seed pockets in the Beefsteak were very small and the slice held together very well, even when sliced thin. The flavor was amazing, I can imagine how great these will be on a BLT as the larger fruit start to ripen.


Our version of the BLT is actually a BSAT: Bacon, Spinach, Avocado, and Tomato with a slathering of mayo on lightly toasted bread... mmmm.

Soon it will be time to start cooking or sharing tomatoes. I can see they will all start to ripen at once. Here is my Roma tomato plant, the fruit is a little smaller than store bought, but look at how much there is.

Monday, June 8, 2009

Garden Visitor--Blue Heron?

About 8 pm on June 7th I noticed some large movement on the fence near the garden. This young fellow had landed on our fence and sat staring at me for a few moments.


I froze and screamed for Curtis to grab the camera. The bird was completely unfazed by me standing there and screaming. I was able to get within 10 feet of him before he flew away. He was not a great flier, it was a very gangly and akward flight, but he was able to easily clear our fence and the trees behind the house before he dissappeared from sight.

I'll have to do some research to figure out exactly what he was. I'm guessing a baby blue heron. We live about two streets away from a golf course with a creek and there are many mature trees everywhere in our neighborhood. I have often seen herons fishing in the creek that is about half a mile from our house too.


As he was standing there, it appeared he was standing on only one leg, and as he flew off, we saw that one leg was just dangling freely. Looking closely at the photos, it is clear that his right leg is very thin and he is not putting any weight on it. I have never seen a heron so young before (and I grew up on a lake). This guy had obvious pin feathers at his head and back and had a very gawky juvenille look to him. I wonder if he had fallen from the nest or was pushed because of his deformity. I hope he'll be okay out in the world. I'm sure he took off becuase he could read my thoughts... I wanted to capture him and nurse him back to health. Mmm, pureed fish anyone?


Boiled Potatoes with Parsley

Boiled Potatoes with Parsley Butter


1.5 lb garden potatoes
2 tbs butter
1 tsp dried garden parsley

Wash and rinse potatoes well. Boil in salted water until tender. Drain water and add butter and parsley to pan. Place back on heat until water evaporates and butter is melted.

Potato Harvest June 2009

What fun we had in the garden yesterday!

Red Lasoda

The tops of the potatoes had started to die back, which means it is time to harvest. I figured I'd dig enough for dinner last night and save the rest for later, but... I ended up digging up all five rows of potatoes and was amazed at how many we got out of our little ~100 square foot bed. I started picking with a small basket, which filled quickly, then Curtis got me a 1 gallon tote, then we had to grab a 5 gallon bucket and we filled all of them with potatoes.

Russet

Back in February and March of this year we planted 2 lb red Lasoda, 2 lb youkon gold, 1 lb kennebec white. I also planted about a pound worth of normal store potatoes (I think they were Russet baking potatoes) which had sprouted in my pantry. I have read many times that these do not produce as well as seed potatoes, but this year, they proved to do very well.


Here is the (almost) final tally:


1.5 lb very small mixed
4.5 lb kennebec white/youkon gold (I'm not sure which is which)
8.25 lb russet
10.5 lb red lasoda

yes that is 35 pounds of potatoes from our tiny little potato patch. Hooray! I call this the 'almost' final tally because there is still one row of Kennebec white growing in the garden. The tops of these plants were still green and lush, and the one plant I dug up on this row had mostly tiny baby potatoes, so I left the rest of the row to grow.


We washed and boiled up the smallest of the potatoes, anything silver dollar sized and smaller was cooked. It totaled up to 1.5 lbs of tiny taters for dinner, but we got to sample some of each variety that way.
Tiny potatoes

We both agreed that the red Lasoda were by far our favorite potato: they have a great tender texture, thin skin and a very nice taste. The Russet potatoes were the second favorite, the flavor was good, but the skin was a little thick and heavy for my taste in boiled potatoes. Considering these are baking potatoes anyway, it is not much of a fair assessment to eat them unpeeled and boiled. Our least favorite was the Youkon Gold, the potatoes themselves were pretty with a nice yellow flesh, the flesh was mealy and the flavor was not special. That being said, all three varieties were worlds better tasting than any potato I have ever bought at the store. I'm not sure we got enough of the Kennebec White to make an accurate assessment on their flavor and texture.

100% Home grown (and butchered) meal

Unfortunately, most of the Russet potatoes had bug holes in them. Some also appear to have been half eaten, then forgotten and the eaten places scabbed over. It may be that these Russet potatoes are not suited for our climate, or are more suscepitlbe to insects. Either way, considering that what I planted was destined for the compost pile originally, even slightly buggy potatoes are a great deal. No bug damage was obvious on the other types which were started from seed potatoes.

We are both so excited about our potato harvest this year. We are already talking about what to do to make it better next year. I think the biggest improvement will be to plant the potatoes much deeper. I have heard that new potatoes will only form between the seed potato and the surface. In other words, the deeper you plant, the more potatoes you harvest. My original plan was to plant shallow and then pile dirt and mulch around the stems to allow them to keep producing. This did not really happen, mostly due to time, but also finding enough dirt and material to rebury the stems was difficult. Since I was 8 months pregnant when we planted these potatoes, I can't fault myself for not planting them deep this time. It was a real challenge to just get the shallow holes dug and covered. Another lesson learned is that crowding onions in between the potato rows did not work. The onions were completely shaded out and did not grow.
Red Lasoda

Normally, we eat about 5 lbs of potatoes every week. So as exciting as our 35 pound harvest was, it is more of a novelty than a real food source. We are looking at designs that will allow us to grow more potatoes vertically. Our little plot was maxed out with this current harvest.