Wednesday, November 2, 2011

October 2011 Garden Upate

The fall garden is coming along nicely, after a dry September (and a high water bill--9000 gallons of water... our typical use is 3-5 thousand gallons per month) October came in with a decent rain storm often enough that I was able to use just rain barrel water on the gardens.

Squash, the plants are pretty small, but starting to produce... small squash


Cucumber


I thought I had planted at least half a dozen cucumber plants, but only one came up (and squash came up in most of the places I expected cucumbers... hmm, maybe letting a 4 year old plants the seeds was not the best idea). So far, the cucumber is doing great, and has a few baby cucumbers starting.

Beans


I love green beans, these guys are coming along nicely and it should be a bumper crop with all of the blooms I see. The plants seem a bit spindly, but seem to be blooming like champs.


Hyacinth Bean (not edible, just pretty)


SO pretty this year, even if it refused to grow over the arbor and instead took over a 5 foot section of fence on each side of the arbor instead.


The bean pods are numerous this year and since I can't (or won't) eat them, I've started using them in floral arrangements (and by 'floral arrangements' I mean the 1 bunch of measly stems and herbs I gave to an elderly friend of mine).

Basil


"MOMMY! My seeds are growing! My seeds are growing!"
Boy is thrilled, I have more basil plants to harvest from, we are all happy and eating our weight in pesto on a weekly basis.

Swiss Chard


Still my #1 favorite garden green. I tried a new way to cook Swiss Chard last week and we all love it: Swiss Chard "chips". I'm still working on the method, but so far, my best attempt involves washing the leaves, rubbing them with olive oil (with my hands) and then sprinkling them with garlic salt and baking at 400F for about 5 minutes until they turn crisp, but not burn--a very fine line. The result is a crisp, crumbly, salty snack that is somewhat like the Nori sheets that come wrapped around sushi rolls. I have seen a similar method for cooking Kale, but never tried it. A few things I need to work out, so far, only about half the leaf turns crisp, the rest stay kind of floppy (tastes just like sauteed, not bad, just not what I'm going for). I crumbled one of the chard chips over my baked potato the other day and it was delicious. I have not figured out how to make this in quantity either, the leaves are so huge, that I can only fit about 3 on a normal sized cookie sheet. It is a work in progress.

Herbs


The herbs all looked scraggly at the end of the long hot summer so in September I cut them down to the ground. They have grown back up with a flourish and are doing great. I knew the Oregano would do well with this treatment, but the flat leaf parsley came back nicely as well.


The weather is holding nicely. On an almost weekly basis we have had cold front that drops our temperatures into the 40s with rain, then within two days we are back up into the 70s again. I love Texas in the fall.

Tuesday, October 11, 2011

Sparkle Pasta! (Pasta with Pesto Cream Sauce)

I made fresh Pesto for the first time this summer and WOW, I am in love. There is no comparison to the bland jarred sauce I have tasted before. I knew this would be a dish enjoyed by the adults of our house, but I was not too sure how the kiddos would take a green sauce that smelled like garlic. I forged ahead with the meal anyway and gave it a fun name in hopes that the kids might at least try it: Sparkle Pasta! (said with a flourish and waving fingers to make it sound amazing and magical to kids)

I needn't have worried, after they got over the initial shock of green pasta (Look at the sparkles, kids! Can you see the sparkles?!) they loved it, and now beg for sparkle pasta for dinner all the time.

The initial recipe came from the Pioneer Woman website, but it has evolved somewhat as I have made this dish over and over and over for my family and friends. I use the original recipe as more of a guideline than a hard and fast rule of how much of each ingredient to add. With pesto, garlic, cheese and olive oil, it is hard to go wrong. The pesto itself is amazing, so fresh and wonderful tasting, but the addition of cream (or half and half, which tastes better to me for some reason) takes this dish to the level of food perfection. Make way more than you think you'll need, it is really, really good.

Pesto Cream Sauce
(source: www.thepioneerwoman.com)

Ingredients
• 3/4 cups Fresh Basil Leaves (I use about 2 cups)
• 1/2 cup Grated Parmesan Cheese
• 3 Tablespoons Pine Nuts
• 2 cloves Garlic, Peeled
• Salt And Pepper, to taste
• 1/3 cup Extra Virgin Olive Oil
• 1/2 cup Heavy Cream (I prefer half and half)
• 2 Tablespoons Butter
• 1/4 cup Grated Parmesan (additional)
• 12 ounces, weight Pasta (we use bow tie, or homemade pasta)
• 2 whole Tomatoes, Diced
Preparation Instructions
Cook pasta until al dente.
Add basil leaves, 1/2 cup Parmesan, pine nuts, and salt and pepper to a food processor or blender. Turn machine on, then drizzle in olive oil while it mixes. Continue blending until combined, adding additional olive oil if needed. Set aside.
Heat cream and butter in a small saucepan over medium-low heat. Add pesto and stir.
Drain pasta and place in a serving bowl. Pour pesto cream over the top. Toss to combine. Add diced tomatoes and toss quickly. Serve immediately.

Growing, Harvesting and Using Sweet Basil

Growing: This is the first year that sweet basil ( Ocimum basilicum ) has really taken off in my garden. It is located in the border outside the main garden. This spot gets sun most of the day, with a bit of shade in the late afternoon from the arbor just to the NW of the plants. The soil is heavy clay, with some compost added each year. The plants survived the drought conditions here in Texas very well with only minimal watering. Toward the end of the summer, the leaves were small, about the size of my thumb, but still tasted great. In September, we began to water this patch heavily and the plants quickly responded by putting on a new flush of large (almost palm sized) leaves.


Harvesting: The leaf is the edible part of the basil plant. To harvest for meals (usually pesto cream sauce, mmmm) we simply plucked leaves from the plant as needed.

Near the end of the summer, the plants bolted and began to flower and set seed. Since this has become a favorite cooking herb of my family, I decided to harvest and save some of the seeds for next years basil crop (if it does not self seed for next year, which I hope it will).


After it flowered, I allowed the blooms to dry on the plant (this was more of a happy accident and the result of garden neglect more than any actual planning or foresight on my part). We collected the dried flowers put them in a colander, which was then placed over another bowl.


Using pre-school labor, we crushed the dried flowers and seed pods to release the tiny black seeds. Shaking the colander gently to allow the seeds to fall through to the bowl below.


Once most of the seed heads had been crushed, we gently blew the chaff away from the seeds, leaving about 1/4 cup of dark black basil seeds.


Uses: Our favorite use is to make Pesto and Pesto Cream sauce (recipe to follow). I also add leaves to spaghetti sauce, stir fry and salad dressings.

Another fun Basil use is to prepare seed packets for friends. In this case, I wanted to share seeds with the attendees of my bread baking class (we made pesto with dinner) so we prepared several seed packets.

I used tiny zipper top bags (like the kind that come with the extra button when you buy a new shirt) and portioned off about 1/2 tsp of seeds per bag. We cut a sheet of plain white paper into small rectangles, folded them in half, and then stapled them onto the bag. My son drew a picture of a basil leaf and I labeled each packet Sweet Basil.

Monday, October 10, 2011

Summer Garden Update 2011

It was hot, it was dry (record from 1980 for number of 100+ degree days was broken this year), and the garden suffered.


One good thing about everything dying is that I felt no remorse about ripping out the spring garden in early September to start over for fall.


Plus, it made for lots of new digging and playing areas for the kids and chickens.


As of September 3rd all but 1 section of the garden was ripped out. The sweet potatoes were limping along and so they were allowed to live on.

Sept 5th planted squash, cucumbers, turnips, carrots, spinach in east garden bed.

On September 8th, I got 1 load of Texas Native mulch from SBS and 1 load of 'Dairy Top Dressing'. These were mixed and then tilled in to the existing soil. Put 2 wheelbarrows on top of east side bed as a top dressing--did not till it in.

The dairy top dressing is aged/composted cow manure and looked like some really nice soil. It did have a strong smell, but that dissipated after a while (sorry neighbors).

Sept 8th planted green beans in North side bed and scattered old pinto bean seeds on South side bed.


Sept 21st, Cucumbers and squash up


and turnips


and beans


September 5th it was 61 degrees. Hooray for the first official break in the summer heat!

Still no rain until October 9th. Yikes.

Bread Baking Class, September 2011

On September 28th I taught a bread baking class for 10 women from my small group at church. It took a lot of planning, but I (and I think everyone else) had a wonderful time. I love to cook, I love to bake, and I love being able to share these things with people who are excited to learn.


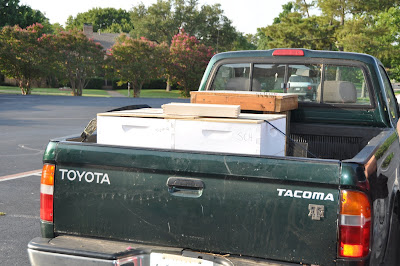
A friend of one of the women was coming to town and she had heard that I liked to bake bread (is that really such an odd thing now? I guess so). It began as a few women getting together to bake bread at my house, after about a week, the guest list had grown and grown and I decided to make use of the commercial kitchen at our church.

The idea also expanded from just learning to bake a loaf of bread, to baking two kinds of bread, making pasta from scratch, and also cooking a full meal for everyone who participated. (Once again, for a Horton, it is not done until it is over done!).


We made French Bread and Craisin Walnut Celebration Bread. For dinner, we all helped to make fresh pasta with pesto cream sauce and grilled chicken.


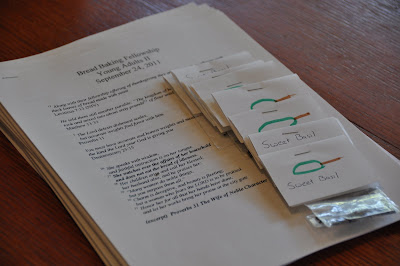
In order to make it easier and more accessible for everyone, I had typed out a copy of all of the recipes, some applicable bible verses (amazing how many times 'bread' is mentioned in the bible) and a packet of our own Sweet Basil seeds for each of the women. One of the things I really wanted to accomplish in this class was to show them that baking from scratch was easy, it just takes time. Andrew helped to draw the basil leaf on each of the seed packets.


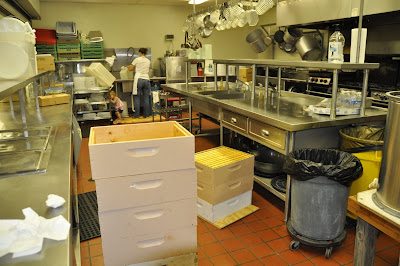
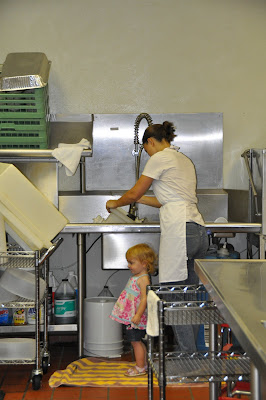
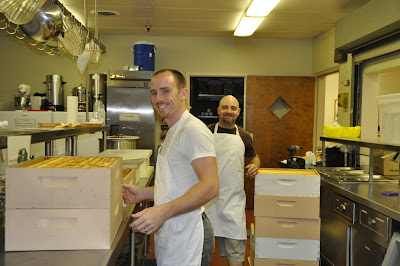
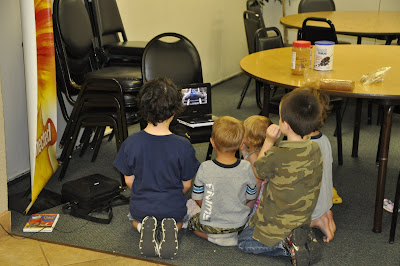
It was a little crazy at first, I've really only ever cooked for myself, my family, and small dinner parties, and I had never cooked in the kitchen at church before. As a practice run, I dragged my family and all my gear up to the church one quiet Sunday night and we let the kids watch a video while Curtis and I did a run through of the class. It went well, I was able to manage the huge kitchen and the big commercial ovens without much trouble.

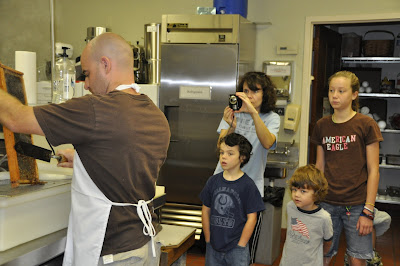
The day of the class, we began at 4:30 in the afternoon with a target of eating dinner at 7:30. I began the class by starting up a batch of french bread as everyone watched. I explained the process of weighing, mixing and kneading, then turned everyone loose to begin their own loaves in pairs.

Everyone began gingerly, but eventually got the idea and started to have more fun with it.

We moved quickly through the recipes. One problem was that my bread baking makes use of scales to weigh the ingredients and I only had two good digital scales, and there were 4 pairs of people baking. This caused a bit of slow down at the beginning of each new recipe.

Before the class, I had printed out copies of all of the recipes for everyone, so they were able to move along at their own pace without too much input from me. I was able to hang back and only step in to help when someone had a question or I had a suggestion.


It was so much fun to not only explain how to bake the bread (anyone can follow a recipe, right?) but to also explain some of the 'why' behind what was happening in the recipe. For example, one helpful cue I came up with (as I watched my hubby manhandle his poor batch of dough during the practice session) was to describe 'kneading' as being like rolling out a play dough snake -- an analogy which went over very well with a group of young mommies! The purpose of kneading the dough is to help form the gluten into long strands in the dough. These long strands will be what catches the air as the yeast activates and help to make the bread light and yummy with lots of air pockets. As you knead dough correctly, it forms a sort-of skin over the surface, the point is to stretch this 'skin' without breaking it and you can do that by kneading it correctly.


I was able to watch and see four different batches of dough as they were being worked and I was able to show the class how each was progressing and the different aspects of making bread. I tried really hard to let each group do their own thing, but I did jump in a few times and help more than I probably should have. (I have been baking bread well for about 2 years now, and it is amazing how natural it feels to me. I only realized this as I watched how unnatural it seemed for someone who was learning it for the first time).

The class progressed quickly and I had to work to keep us on the schedule I had set out (so we could eat by a decent hour).

We made pasta with fresh eggs from our chickens at home. We made 6 batches of dough, 2 eggs each. (I wish I had thought to make 1 batch with store bought eggs so everyone could see the difference in 'yard bird' vs commercially kept chickens--the color difference is striking. The yard eggs make a dough that is a pretty yellow color, and the store egg dough is pale white).

Once all the breads were rising, I could tell that some of the class was starting to get restless, but a few were still very interested. I had planned on cooking much of the meal myself, but I was able to ask a few of the more focused women to take on a different part of the meal. One helper cooked the chicken (my least favorite part, and she did great!). One helper rolled out and cut the pasta dough, one helped me to make the pesto and one cooked the endless stream of noodles we made.

The last hour was a blur as it all came together.


Finally, success! The meal turned out great, the bread was delicious (and most of it was still baking as we sat down to eat. Part of my reason for doing the first loaf of french bread myself was to set the pace for the meal and to ensure that we had a loaf ready to eat by 7:30pm).

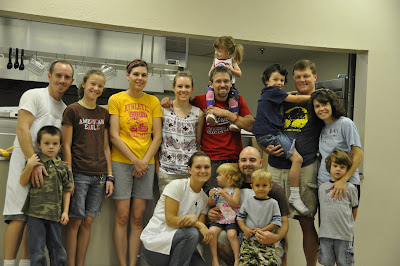
We were all able to sit, eat, relax and really enjoy each others company after a hard 3 hours of work in the kitchen.


I have organized a couple of 'girls nights' for a few of these women before. The nights were fun, we ate at a restaurant $$ and then met back at my house to visit. It is nice to visit, but I always felt like I had wasted a good kid-free evening at the end of the night. This class was so much better, we were able to visit, we were busy enough to really get to see each persons personality and we were able to accomplish a lot.

I think that much of the joy of cooking has really been lost in my generation. Between take-out food, 'brown and serve' dinners, and 30-minute meals we have had it beaten into our heads that cooking is an unpleasant chore and it should be tackled with as little effort as possible so we can get on to more important things. What can be more important than feeding your family or sharing a meal with friends? Yes, this meal took a solid 4 hours of work, but it was time spent with friends, and the dinner tasted so much better knowing that it was lovingly made. Admittedly, this was not a dinner I would tackle on a work night, but it made for a great Saturday evening with friends.

Even after all of the preparation and the work that went into the class, I went home energized and excited and already planning my next class.

Notes:

1) 10 people was the maximum that the church kitchen (and me) could handle at one time
2) stagger the start times or get more scales / sets of ingredients
3) needed baking stones to help the ovens maintain temperature while all that bread was being put it (the bread took too long to bake and never browned nicely due to the mass of bread being added at once)
4) This would be a great fund raiser for the church. Several people offered to pay (I said no) and the event was more fun that the bread class I paid $80 for in 2010
5) the church kitchen was missing most of the cooking implements (bowls, trays, pots, measuring spoons, stirring spoons) I'll need to plan for this better for next time. We need 1 bowl per recipe and that bowl cannot be re-used for the next recipe (bread has to rise in the bowl).

Thursday, September 1, 2011

Hi Honey! Honey Processing 2011 -- extracting

Bright and early Monday morning (July 4th), we quickly loaded up the supers into our truck and headed up to our church to do the honey extraction.


At the church, we met up with our other beekeeping friend, who was able to borrow the extraction equipment from another bee keeping friend.


We loaded all the equipment into the tiny scary elevator and headed to the basement of the church. We are so lucky this year that we were able to borrow the commerical kitchen of the church for the day so we could extract our honey. Due to food safety laws, if you plan to sell honey, you must extract it in a commercial kitchen to be in compliance with food safety laws. Yes, there are ways around this, and many people cannot afford a commercial kitchen setup. We were very lucky that we were able to use these really nice facilities.


I immediately got to work washing up equipment in the wonderful commercial dish wash station (I want one of those faucets at my house, it was AWESOME!).


Meanwhile, the guys assembled the rest of the equipment and set it up assembly line style so we could move quickly through our tasks.


By 9 am we were up and running. The process was much the same as last year, except we were not packed into my tiny kitchen, nor were we battling bees as we came in and out of the house. Step one: use the hot knife to cut the wax caps off of the frames.


Step 2: use a pokey tool to open any cells that were missed by the knife (yes, Dr. Aaron came back, and his wife brought snacks!)


The frame are then loaded into the centrifuge and the honey is spun out.


The honey is then poured into buckets.


One other fun thing about using the church kitchen is that we were able to invite anyone who was interested to come watch (and help). All told, we had 15 people there for a while.


The kids played with puzzles and made forts under the tables and were captivated watching our tiny portable DVD player.


This step of the honey extraction process ended with empty supers carried back up the stairs and many very heavy buckets. We finished up about 4 pm and were all exhausted and sticky after a hard days work.


The next step (the next day!) meant that hubby carried those same buckets BACK down the stairs and filled all our honey jars.

Hi Honey! Honey Processing 2011-- in the beeyards

We extracted honey a little early this year, on July 4th, 2011. In summary, 2011 was an amazing year for our bees! We extracted over 5 gallons of honey, that is about 150 pounds of honey. We were also able to do a lot of outreach and education. For every part of the extraction process, we had an eager audience. What fun.

Part I: On Saturday July 2nd, we pulled the supers off of the hives we have in Bells. These bees are pretty much neglected most of the year, add in our not-so-textbook methods of saving comb from the bee removals and the mis-mash of equipment we own and the result was that the inside the hives was a mess.


Hubby did some much needed cleanup (scraping off burr comb, cleaning out dead out hives, and removing the comb from long forgotten inside feeders), I helped wherever I could.


There are two remaining hives in Bells (we lost two over the winter). Inside the hives we were happy to find that there were almost ZERO pest problems, no visible mites, no wax moths, and no small hive beetles. The bees had completely ignored certain frames, and overfilled others. Brood was present in several layers of the box, but we did not use queen excluders in this case so that is our fault. Despite the messy condition of these 2 hives, we were able to pull off 13 strong frames of honey.


Our kids and grandma and grandpa watched happily from the air conditioned cab of their truck. We did learn that working the bees in this bee yard is wonderful in the late afternoon, the tall cedars to the NW of the hives made for some very welcome shade while we worked.

Part II
Sunday afternoon, we worked the hives at our home in Farmers Branch. We had an eager helper from our church who wanted to learn more about bees. Ha ha, ask us to teach you about bees and we'll put you to work... nothing like hands on education!


Dr. Aaron got all suited up and watched in fascination as hubby worked his way through the hives.


Also watching (from the comfort of my air conditioned sewing room) were his wife and daughter.


After just a few minutes of working in the stiff, hot gloves, Dr. Aaron got brave and decided to go gloveless, just like us.


Four more hives worked and no stings, hooray!


Here is our haul the night before we processed. 7 supers nearly full of frames. I think we had 63 frames total. The stack of supers was nearly as tall as I was... and yes, we stored the supers in the house for over 24 hours before processing. We were very careful to get each and every bee out of the supers so it turned out to be a fairly safe way of doing things. If we had left these sweet smelling supers outside, the bees would have swarmed them trying to get at the 'all you can eat' honey buffet hidden inside. Inside the house, the supers were shielded from curious bees.


Tuesday, June 14, 2011

June Garden Update

2011 has been a lackluster year in the garden. Things are growing, but only doing okay, not great.

First the good (of course).


The green beans have made a good showing. We have had more than enough for dinner and to share, and I have also put up about a quart into the freezer. As of June 14th, the plants are looking wilted and tired and I think the harvest is tapering off.


My potatoes did well, but I did not buy enough seed potatoes. I planted 2.5 pounds and harvested 12.5 pounds. It is a decent yield for me ~6x and right on par with my best potato harvest ever (planted 7 pounds, harvested 35 pounds in 2009). I had zero bug problems in my main potato patch this year, not so much as a bug nibbled potato in the whole harvest. This is great news, and much better than a friend of mine who reported that his potatoes got blight and he does not expect any harvest at all this year. I think one big factor was that I rotated the location of my plantings this year. One volunteer potato plant came up in the 'old' location and that plant suffered from pests and some sort of wilting disease so I pulled it early.


Sweet Potatoes. Well, I can't count this as a harvest yet, but I am so happy that this year I was able to plant over 35 sweet potato slips grown from sweet potatoes that we had bought to eat. Each time I found an eye on a sweet potato I was about to cook, I would cut off a small section of the potato containing the eye and stick it in a pan with water. After about 6 weeks of this, I had a huge crop of sweet potato slips in my kitchen window. I planted 9 plants prior to June and then planted the remaining 25 slips after I harvested the white potatoes. There are about 10 more slips that are still forming roots in the window. This was a great learning experience and very successful way to get lots of sweet potato plants (even before the harvest).

Also doing well (without photos) are: Swiss Chard, mint, oregano, basil, also pumpkins and winter squash (all very healthy and producing volunteers).

I had okay luck this year with my spinach, garden peas, summer squash. These are producing okay, but just not thriving.

And now the bads... my poor tomatoes look awful, the plants are small and anemic, there is very low fruit set (no fruit at all on most of the plants), and there is some sort of disease or pest causing a yellowing of the leaves. The "Little Porter" tomato is the only one that seems to be thriving. Brandywine has a strong plant, but no fruit. All the others look awful. Considering that Hubby judges the success of my garden by the weight of tomatoes produced... this is a dismal year.

Eggplant, cucumbers: both fell victim to the hail and never recovered.

Corn. I guess since this is the first year I have planted corn, and it got the shady side of the garden, I can't call this a true failure. I have about a dozen corn plants, waist high, and they are starting to flower (tassel?, ear?, fruit?, produce?). I am not sure what they are doing, but they are starting to form something that I hope will turn into corn. Since I have such a small patch, I am counting on having to pollinate these things by hand (with a brush) since corn is wind pollinated and you need a strong stand of corn to get good pollination.

Peppers: the seeds I planted did not germinate, so on June 10th I bought two pepper plants from the store.

Mulberries: these are not in my garden (or even in my yard) but the trees down the street had a very light harvest this year. I kept watching and waiting for the fruit fall to really kick in (last year, it stained the sidewalk and street purple from all the fruit), but this year... not much. We did not even walk down to try to harvest any, I figured with such a light harvest the birds needed them more than I did. Hubby points this out to me as proof that we should take advantage of the good years when they happen (for example, we are still eating last year mulberry jam with about 8 pints left to go). Good lesson.

Peaches: similar story to the mulberries, not my tree, but my friend's and he has reported a very small harvest this year. We do NOT have any peaches left over, so I will have to buy them to can this year.


Other milestones in the garden this year: compost! Hubby has taken over the compost area and expanded it to 4x what I had. He is diligent about turning it and even brings home other people's veggie scraps and coffee grounds from work to add to his compost bins. We have already gotten a 55 gallon drum full of finished compost which we added to the garden when we planted the sweet potatoes. It is some very pretty stuff.
Rain water: the water totes are hooked up and working great... now if we can just get some rain.
Bees: the girls are working hard and as of May we had more supers on the bee boxes than we had at harvest time last year. Hooray bees.